
Brighten Your Space: 15 Kitchen Lighting Design Ideas
Great Kitchen Lighting Design does more than help you see. It makes daily life easier and your space feel warm and welcoming. A bright, even base glow lets you move around safely, while focused light helps you chop, stir, and clean without strain. Accent light adds that “wow” factor you see in design photos—soft highlights on tile, a gentle glow under cabinets, or a cozy shine over a breakfast nook. When these parts work together, your kitchen feels bigger, cleaner, and more peaceful. You’ll notice fewer dark corners, better color in your food, and a mood lift every time you walk in.
Safer Cooking, Happier Mood
When counters are dim, shadows hide what you’re doing. That can be risky with knives and hot pans. Bright task light keeps the work area crisp and safe, so you can prep with confidence. Good lighting also supports your mood. Cool light wakes you up for morning coffee; warm light calms the room at night. If your Kitchen Lighting Design is where your family gathers, lighting becomes part of the vibe—friendly, calm, and welcoming. The right fixtures make the room feel put-together, like a favorite café, but tailored to how you live.
Light That Makes Colors and Food Look Better
Have you ever noticed how tomatoes pop red in some Kitchen Lighting Design but look dull in others? That’s color rendering. Bulbs with a high CRI (90+) make ingredients and finishes look natural. Your wood tones read richer, your white cabinets look true, and your marble veining stands out. Pair that with the right color temperature—around 2700K–3000K for cozy, 3500K–4000K for bright and fresh—and you’ll see both your food and your space at their best. Small tweak, big difference.
The Three Layers of Kitchen Lighting
Think of Kitchen Lighting Design as layers on a cake. Ambient lighting is the base—an even glow across the room. Task lighting is the second layer—focused beams where you actually work. Accent lighting is the top—pretty details that add sparkle and depth. When you balance all three, your kitchen works well day and night. You won’t fight harsh glare or sit in moody shadows. Instead, you can create “scenes”: bright for cooking, soft for dinner, and low for late-night tea. This layered approach is the secret behind magazine-worthy kitchens.
Ambient (Your Room’s Base Glow)
Ambient light fills the whole room. It might come from recessed lights, a central flush mount, or a large pendant. The goal is simple: no dark holes, no caves, and no harsh hot spots. Place fixtures so light overlaps a bit, like a soft grid. Add dimmers so you can dial down for calm evenings. If your ceiling is low, choose slim or recessed options to avoid visual clutter. Ambient light sets the stage so every other layer can shine.
Task (Focused Light Where You Work)
Task lights are your helpers. Under-cabinet strips brighten chopping zones. A pendant or sconce over the sink makes scrubbing and rinsing easy. A focused fixture over the range shows true color when food finishes. These lights should be bright but not blinding. Look for shielded fixtures or diffusers to soften the beam. When task lighting is done right, you stop leaning forward to see—everything feels clear and effortless.
Accent (Style, Drama, and Warmth)
Accent lights are the mood makers. Think toe-kick LEDs that float your cabinets, small spots that wash a stone backsplash, or glass-door cabinets lit from within. These touches add dimension and a designer look without a huge spend. Use warm tones and low brightness for a soft glow. You’ll be amazed how a simple strip under a shelf can make the whole room feel thoughtful and finished.
Planning Your Kitchen Lighting Like a Pro
Before you buy anything, plan. Sketch your Kitchen Lighting Design and mark zones: prep, cook, clean, serve, and sit. Note where shadows fall—often right under upper cabinets. Decide what you do in each spot and choose lights to match. Measure ceiling height and island length so fixtures feel in scale. Finally, plan your switches: one for ambient, one for task, one for accents. Smart switches or dimmers let you set scenes with one tap. Planning avoids costly re-dos and gives you a clean, simple setup that fits your daily rhythm.
Map Your Work Zones
Start at the sink, stove, and main prep counter. These areas need bright, shadow-free light. Put under-cabinet strips along the front of cabinets (not the back) so the beam hits the counter. Over an island, plan for even coverage—two or three pendants or one long bar. If you eat in the Kitchen Lighting Design, add a softer fixture over the table to set the mood. Work zones make choices easy: each zone gets the light it needs, nothing more, nothing less.
Match Bulb Type, Brightness, and Color Temperature
Choose LEDs for long life and low energy use. For brightness, look at lumens, not watts. Counters feel great around 500–700 lumens per linear foot of under-cabinet light, while general room light varies with size—aim for even coverage you can dim. Color temperature guides the feel: 2700K–3000K is cozy and golden, 3500K is balanced, 4000K is crisp and daylight-like. Keep the whole kitchen within a narrow range so things look consistent.
15 Kitchen Lighting Design Ideas
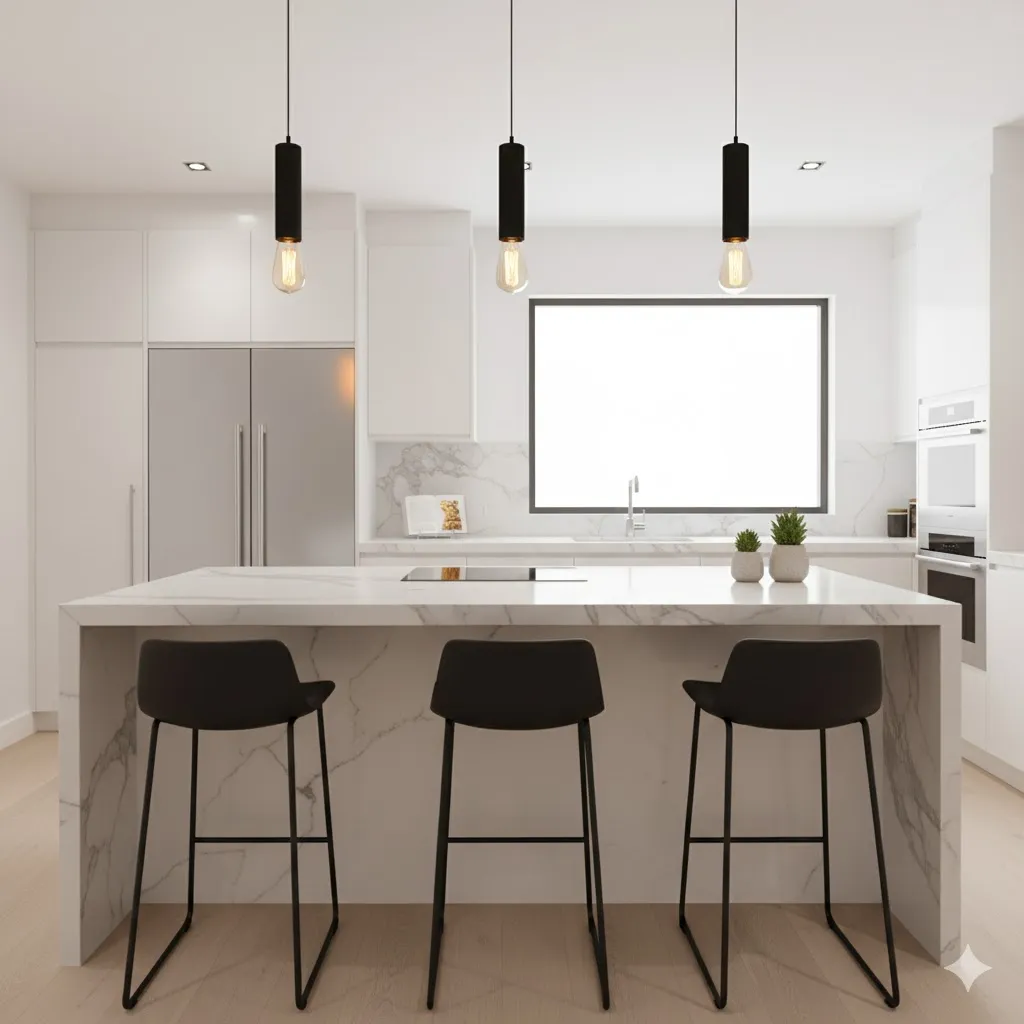
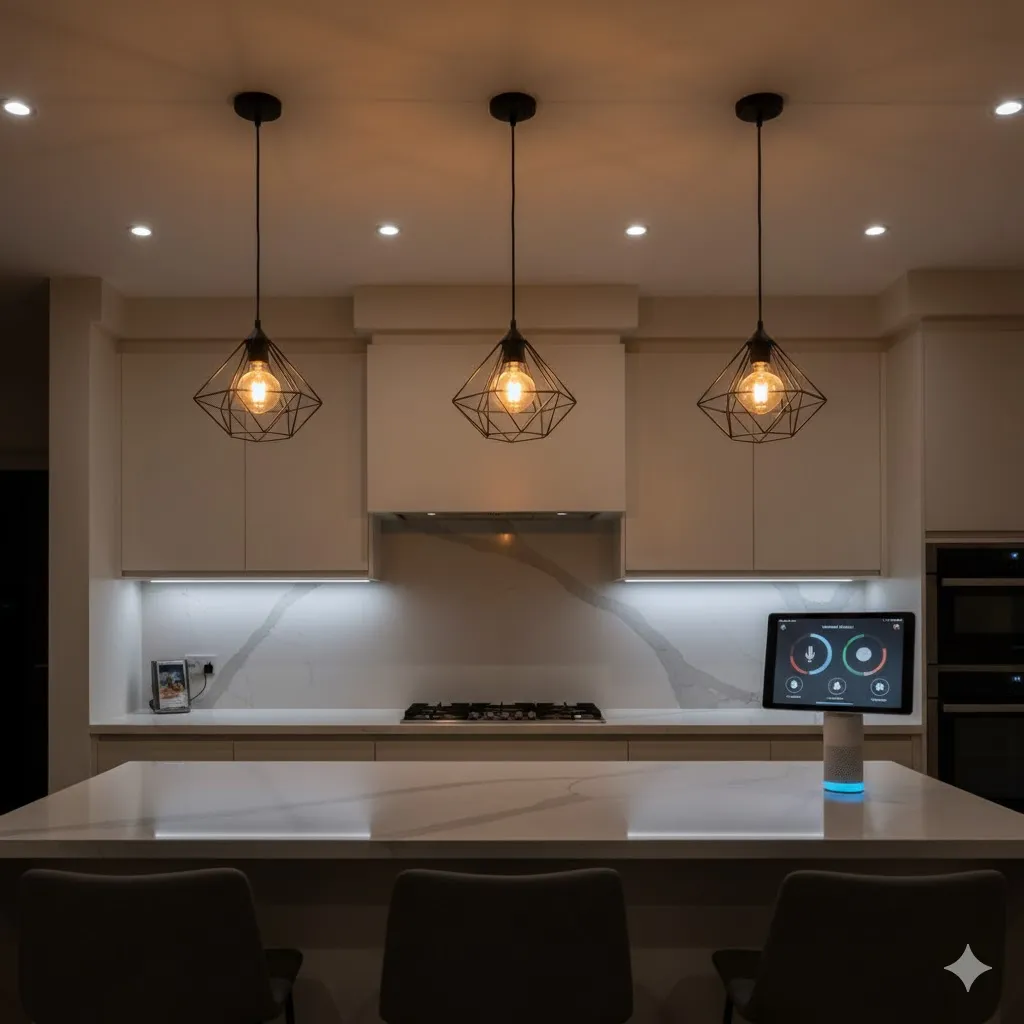
1) Pendant Lights Over the Island
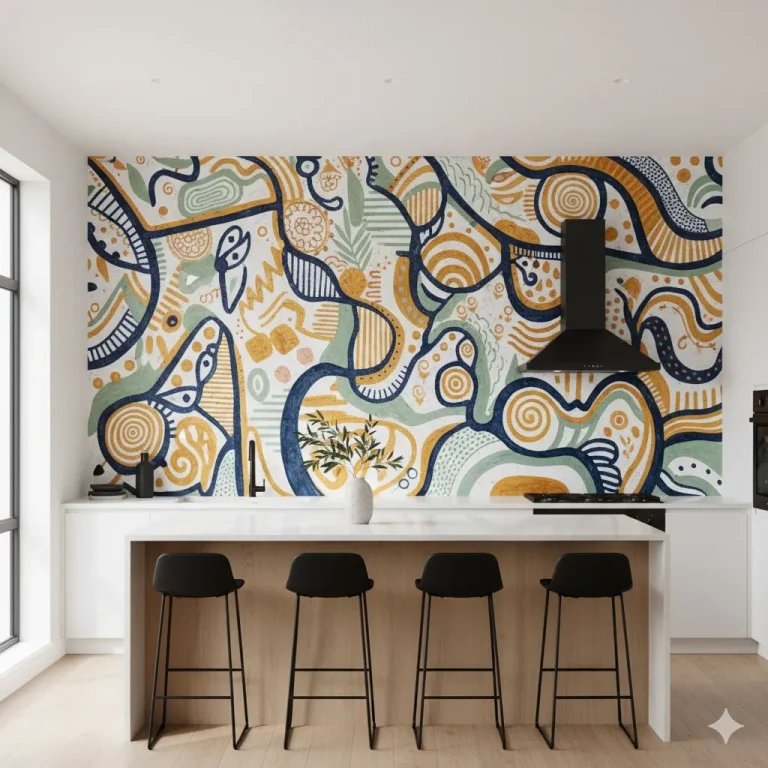
Pendants are the jewelry of the Kitchen Lighting Design. They add style while focusing light where you prep, chat, or serve. For sizing, try this: choose pendants 10–16 inches wide for small islands and 16–24 inches for larger ones. Leave about 24–30 inches between pendant bottoms and the countertop so sightlines stay open. Two or three pendants usually look best; space them evenly. Metal domes give a modern, clean look, while glass shades feel light and airy. Put them on a dimmer so they can switch from bright task light to soft dinner glow.
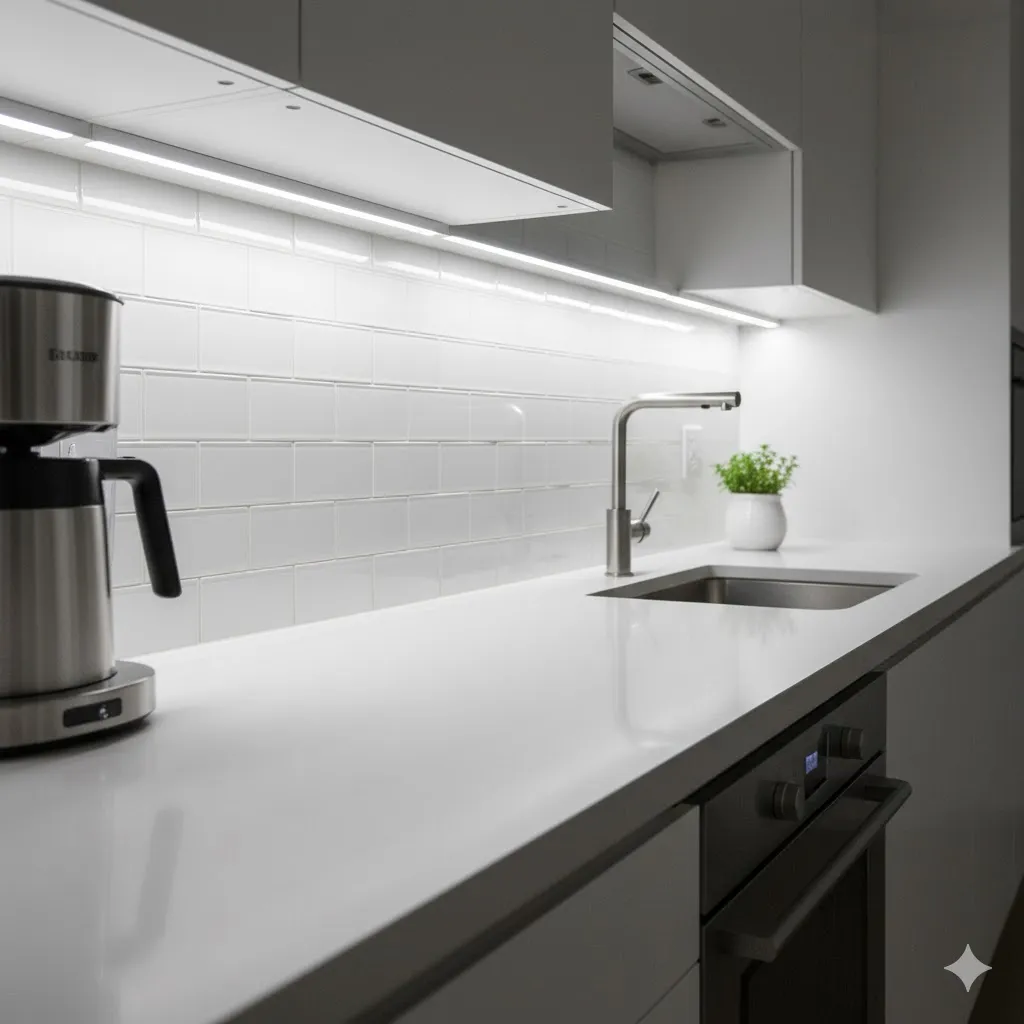
2) Under-Cabinet LED Strips
If you do only one upgrade, make it under-cabinet lighting. Strips erase shadows and make chopping safe and simple. Mount them near the cabinet front edge so the beam falls across the whole countertop. Choose a high CRI for true color when cooking. Pick a diffuser to avoid dots on shiny counters. You can hardwire for a seamless look or use plug-in strips if you rent. Add a small touch switch at the bottom of a cabinet for easy on/off. The result: bright counters, no dark lines, and a pro finish.
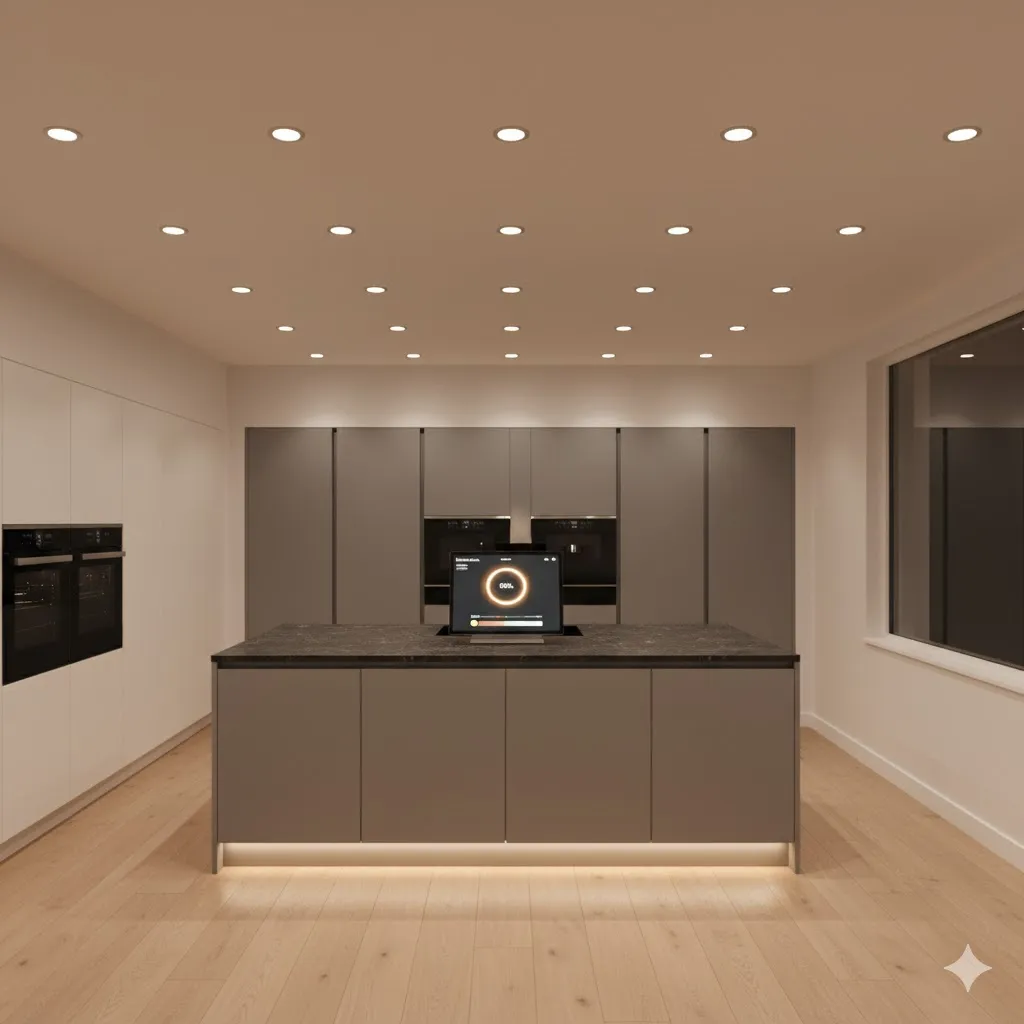
3) Recessed Lights With Smart Dimming
Recessed cans give clean, even light. Space them 4–6 feet apart, offset from cabinets so doors don’t cast shadows. Use adjustable (gimbal) trims to aim light where you need it. Connect to a smart dimmer so you can create scenes: “Cook,” “Eat,” “Nightlight.” Choose warm-dim bulbs that shift to a cozy tone as you lower brightness. This brings calm in the evening and keeps mornings fresh and bright.
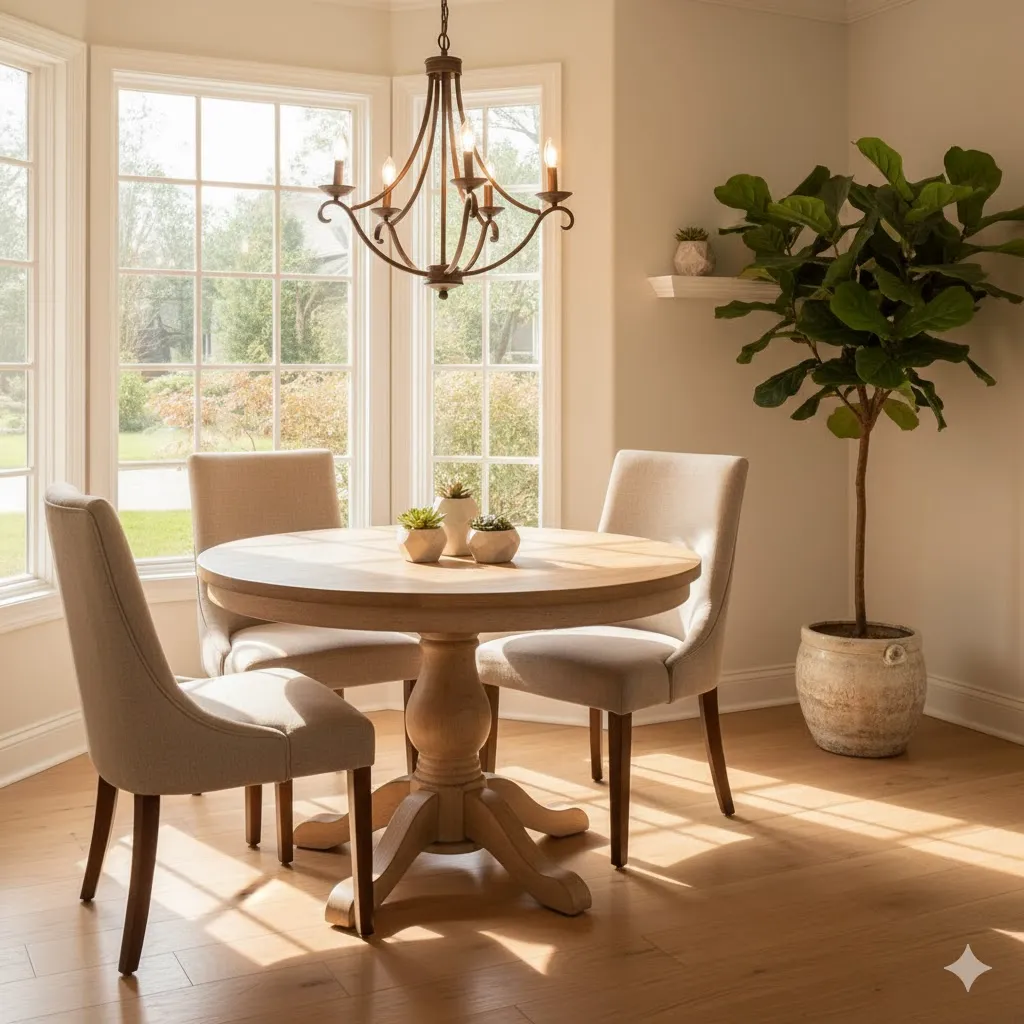
4) Statement Chandelier Over a Breakfast Nook
A chandelier over a small table makes breakfast feel like a moment. It defines the nook and adds charm without taking over the room. Hang the fixture so the bottom is about 30–34 inches above the tabletop. Pick a size that fits: measure your table’s width and choose a fixture about half to two-thirds that size. Fabric shades give soft light; glass keeps things bright; woven textures add warmth. Put it on a dimmer for slow mornings and relaxed dinners.
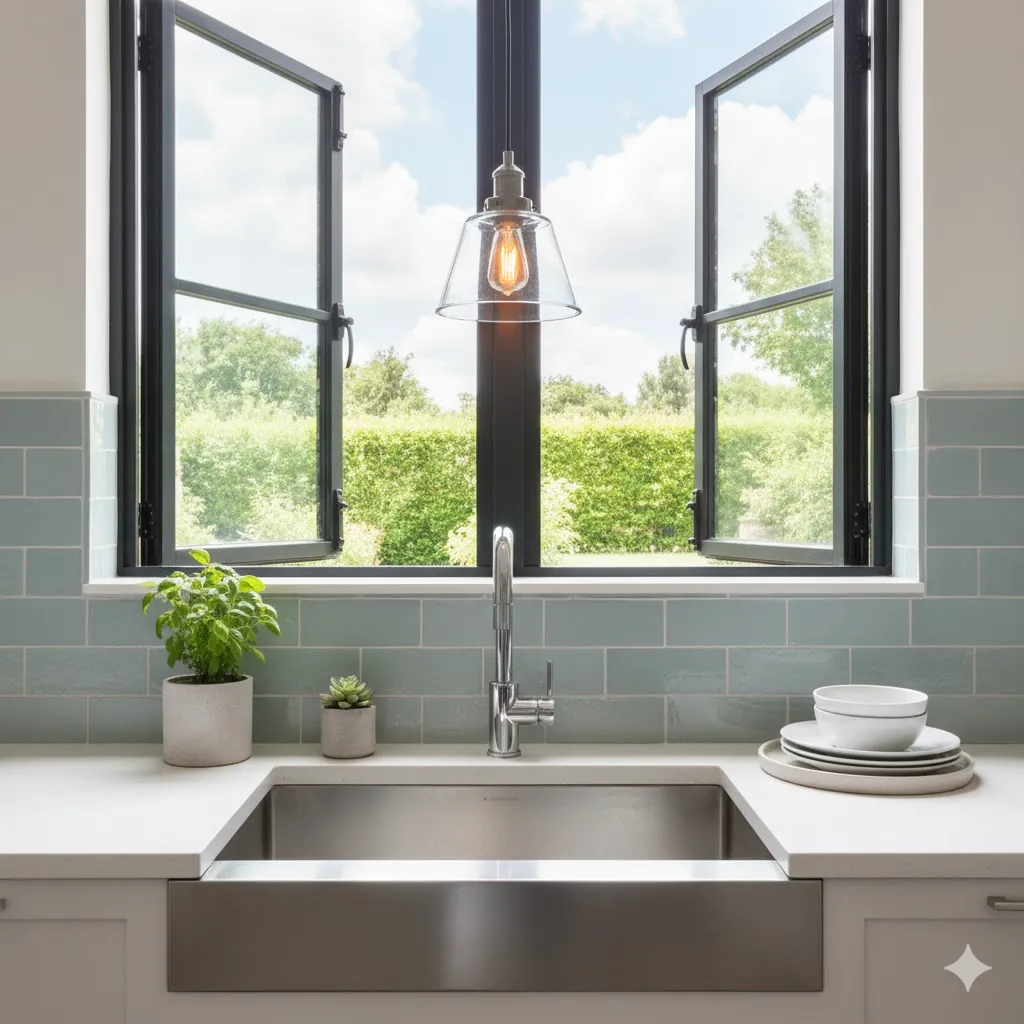
5) Over-Sink Sconce or Mini Pendant
The sink deserves its own spotlight. A small sconce or mini pendant makes washing and rinsing easy and adds style to a plain wall. If there’s a window, hang the light high and centered so it frames the view without glare. Choose damp-rated fixtures if moisture is an issue. Match the finish to your faucet for a pulled-together look, or mix metals for interest—black with brass is a favorite combo.
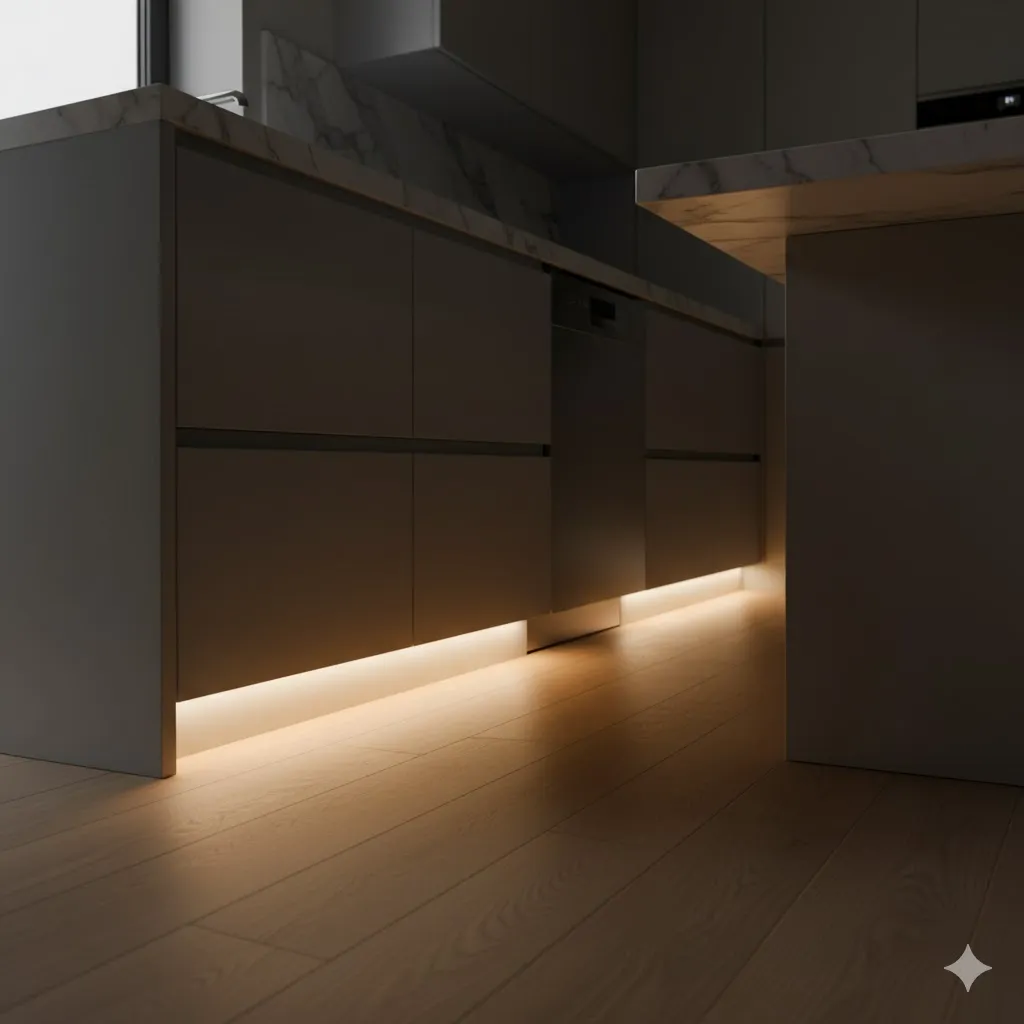
6) Toe-Kick and Toe-Space LEDs
A thin LED strip along the toe-kick floats your lower cabinets and guides steps at night. It’s subtle but effective, perfect for midnight snacks or early coffee. Choose warm light and keep it dim. Motion sensors make it hands-free: as you walk in, a soft glow leads the way. This trick also makes small Kitchen Lighting Design feel bigger by adding a second “layer” of light low to the floor.
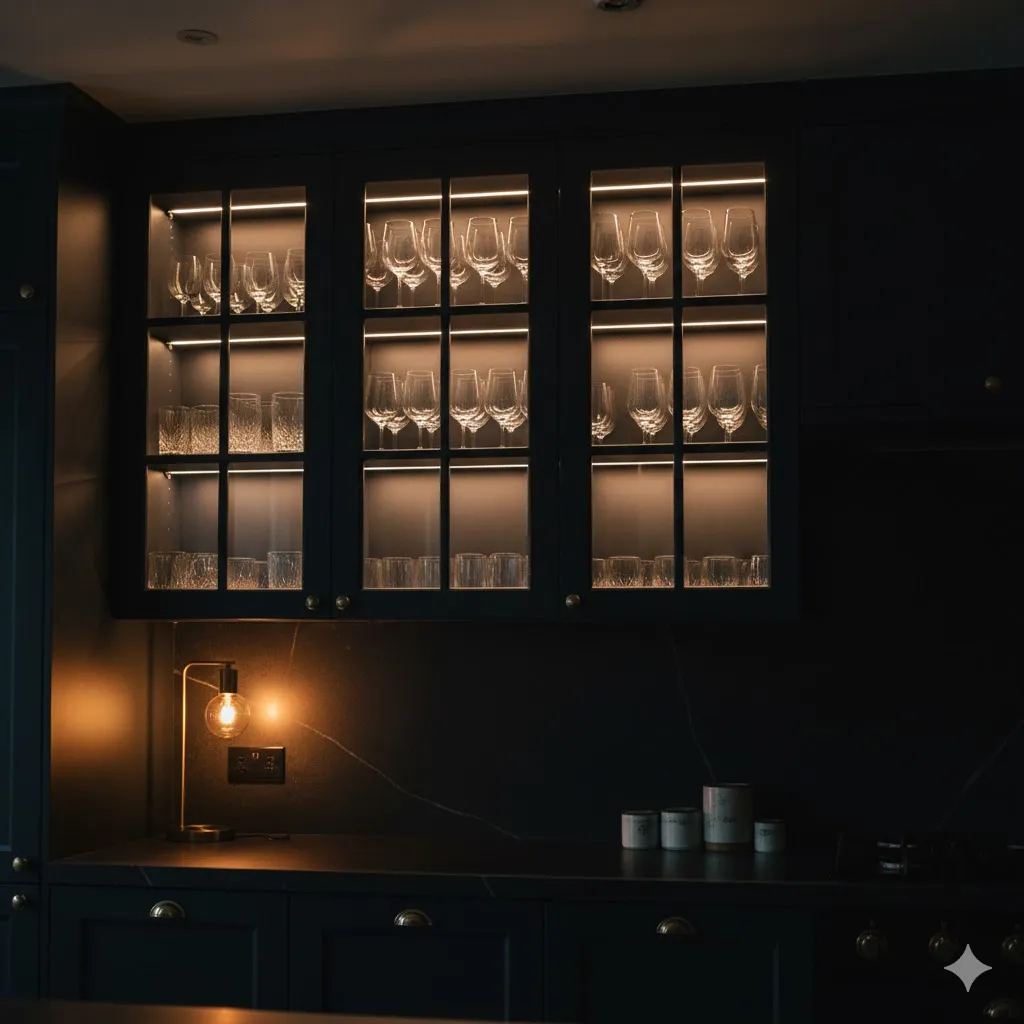
7) Inside-Cabinet Lighting for Glass Fronts
If you have glass-front cabinets, light them up. Small puck lights or LED strips at the top create a soft showcase for dishes and glassware. Use warm light so the cabinet feels inviting. A simple in-line switch can tie them to your accent scene. This idea turns storage into décor and adds depth across the room—especially pretty at night when other lights are low.
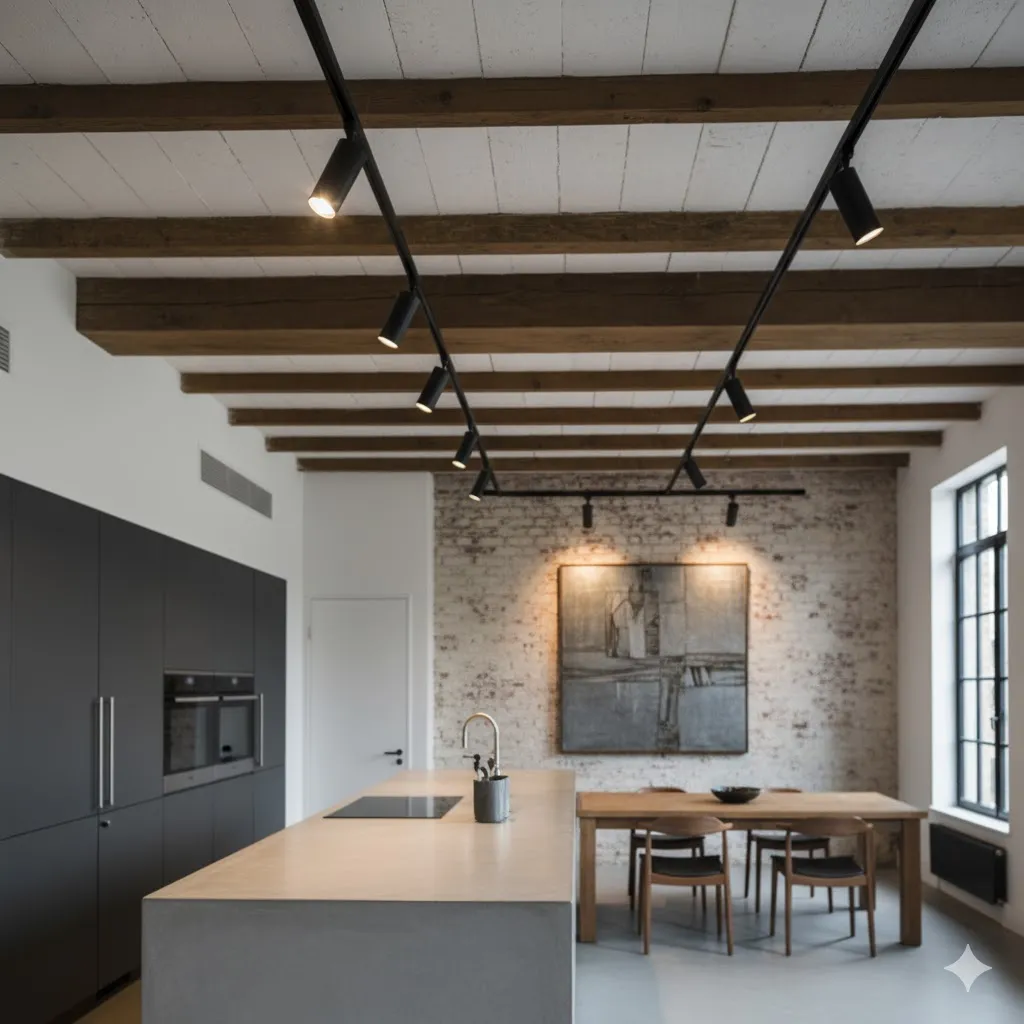
8) Track Lighting You Can Aim Anywhere
Track lighting is flexible and renter-friendly in many cases. One ceiling run can point beams to the stove, art, or a dark corner. It’s great in older homes where wiring is tricky. Choose a low-profile track that blends with the ceiling. Use a mix of flood and spot heads: floods for general glow, spots for highlights. When your layout changes, just swivel the heads—no rewiring needed.
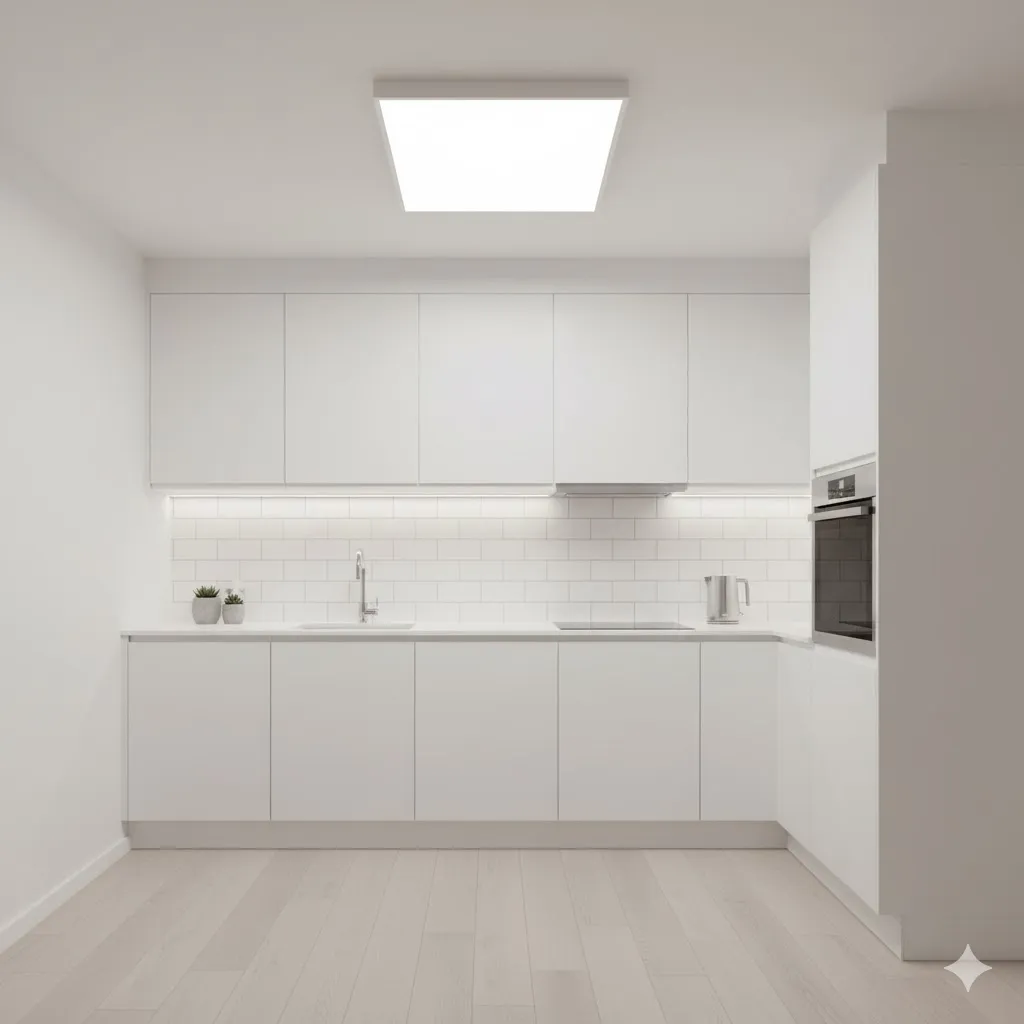
9) Flush-Mounts for Low Ceilings
If your ceiling is low, keep fixtures close to it. A slim LED flush-mount or semi-flush light spreads even illumination without crowding the room. Look for fixtures with a wide diffuser so light reaches walls as well as the floor. Pair with under-cabinet strips to cover tasks. The combo feels bright and open, even in tight spaces.
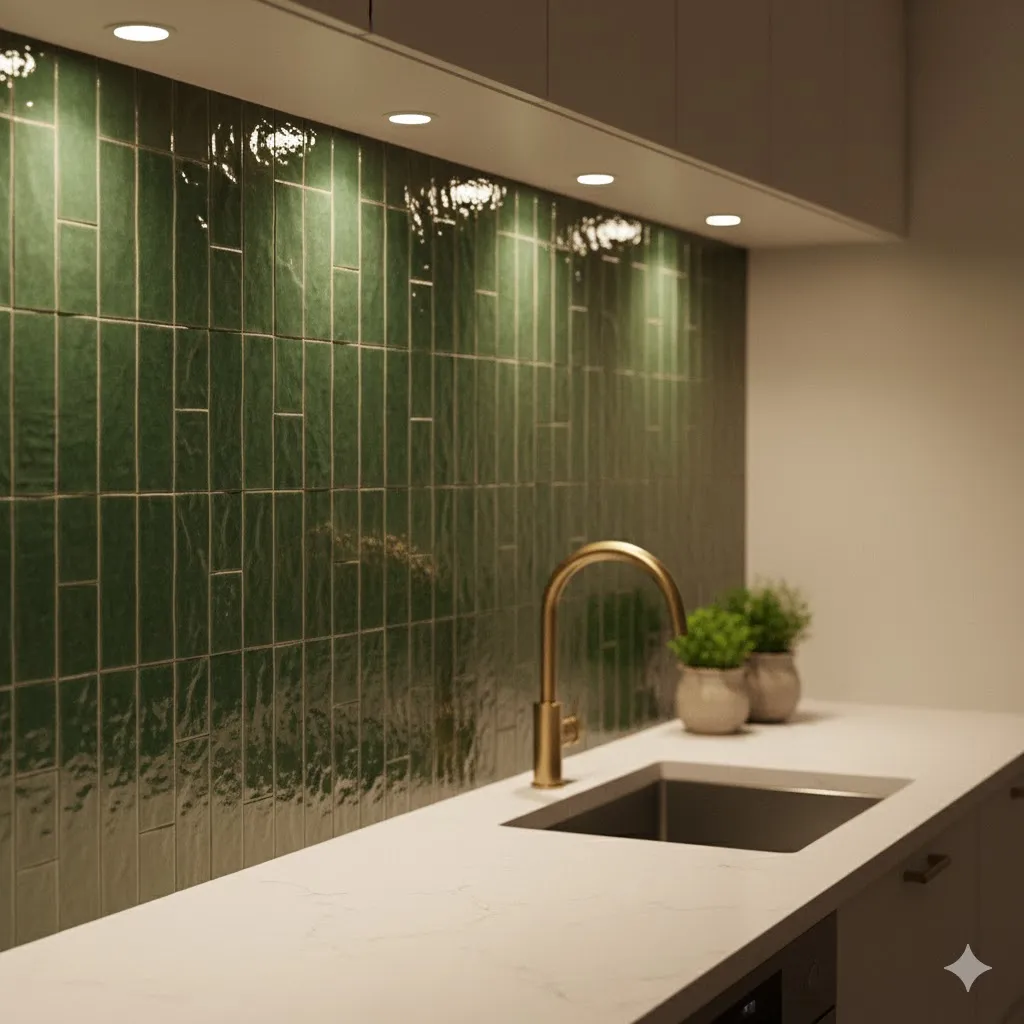
10) Wall Washers to Brighten Dark Corners
Wall-washing lights aim a soft beam down the wall, making rooms feel wider and cleaner. Use them on a textured backsplash or a tall pantry wall to add depth. The gentle spread hides small flaws and makes paint look richer. Keep brightness modest and color warm. This is a designer move that looks expensive but is simple to install.
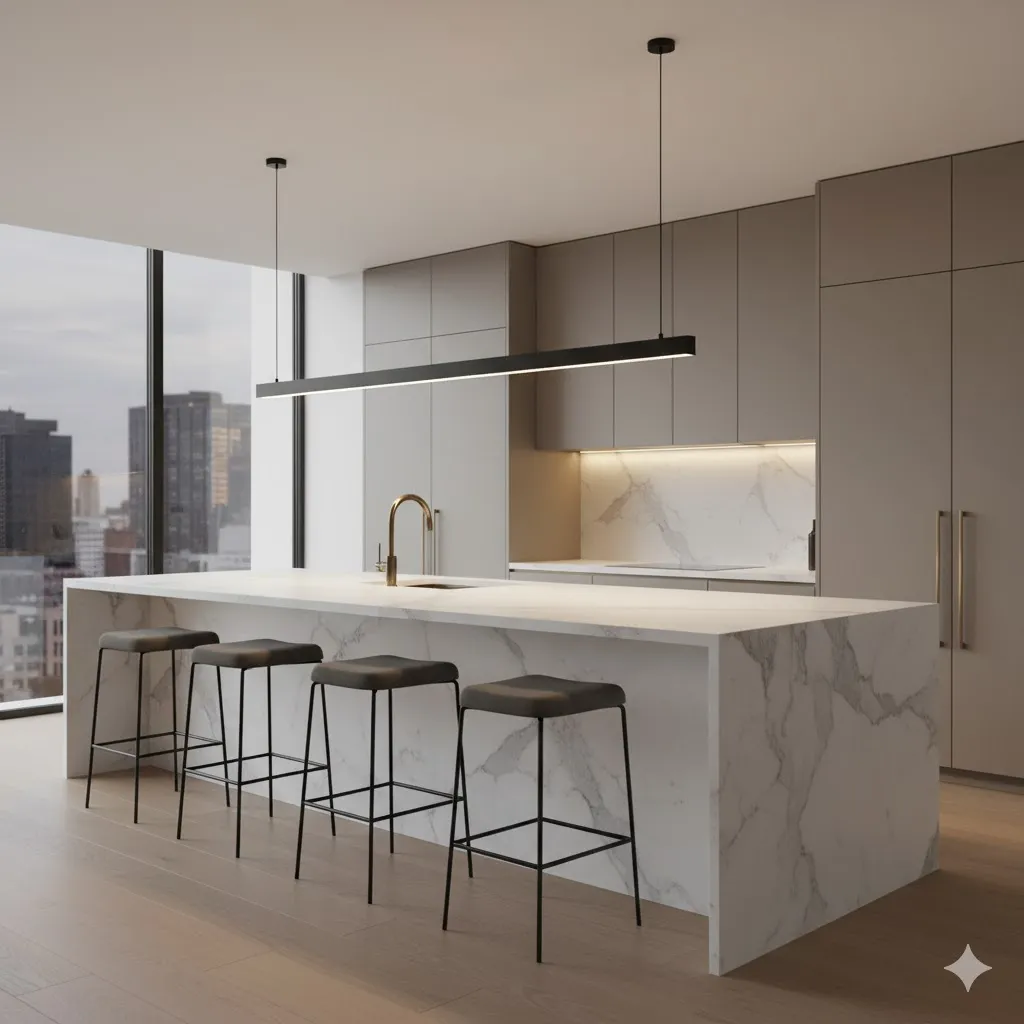
11) Linear Suspension Over Long Islands
For long islands, a single linear bar gives tidy, even light without the visual clutter of three pendants. Choose a slim profile that echoes your cabinet lines. Hang it level and center it carefully—it becomes a strong design line in the room. With a dimmer, Kitchen Lighting Design you can jump from bright meal prep to cozy chat in a second.
12) Layered Lighting Scenes With Smart Controls
Smart switches and bulbs let you save scenes: full bright for cooking, warm and low for dinner, nightlight for after hours. Voice control helps when your hands are messy. You can also schedule gentle morning fades or bedtime dim-downs. This is less about gadgets and more about comfort—your kitchen meets you where you are, Kitchen Lighting Design from busy to calm.
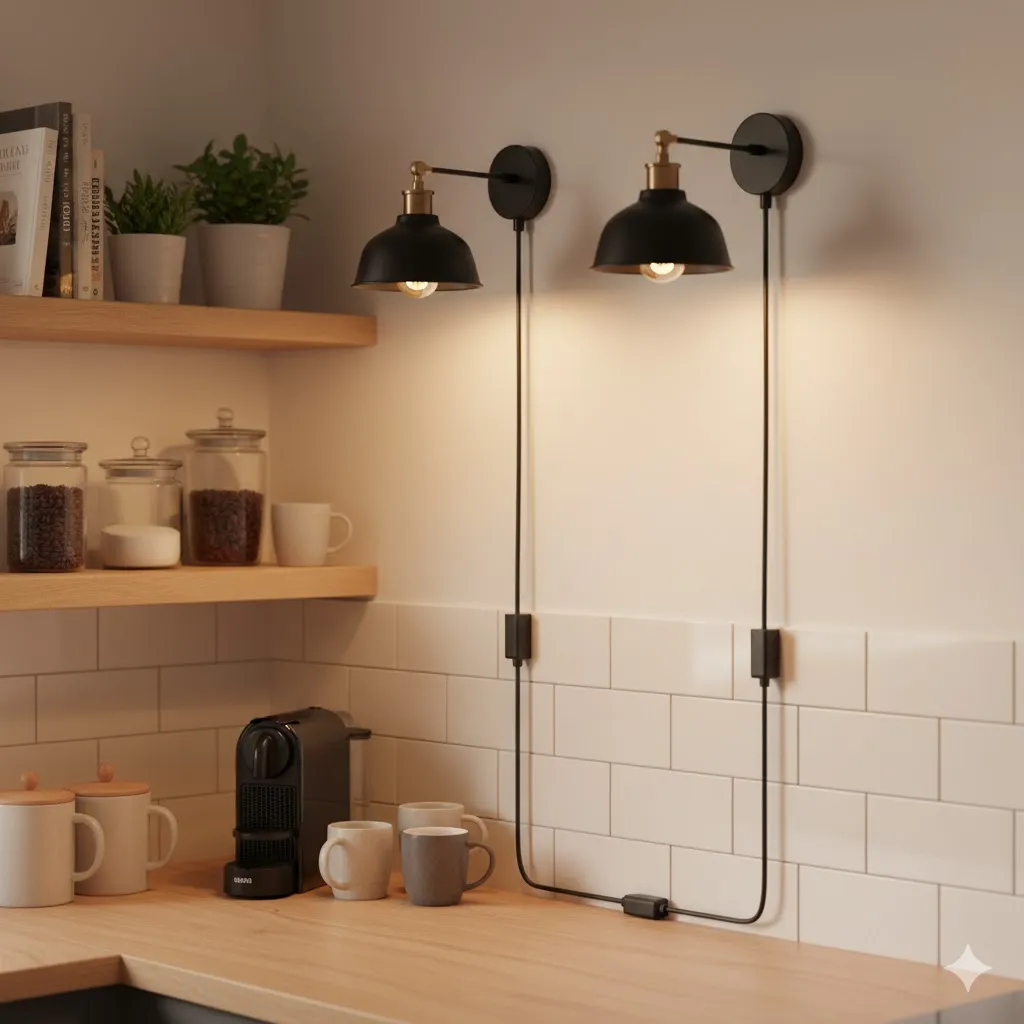
13) Plug-In Sconces for Renters
No hardwiring? No problem. Plug-in sconces bring style and task light to sinks, shelves, or coffee stations. Use cord covers to keep things neat. Many styles have on-cord dimmers for quick control. Choose adjustable arms so you can aim light where you need it. When you move, they come with you—instant upgrade, Kitchen Lighting Design zero electrician.
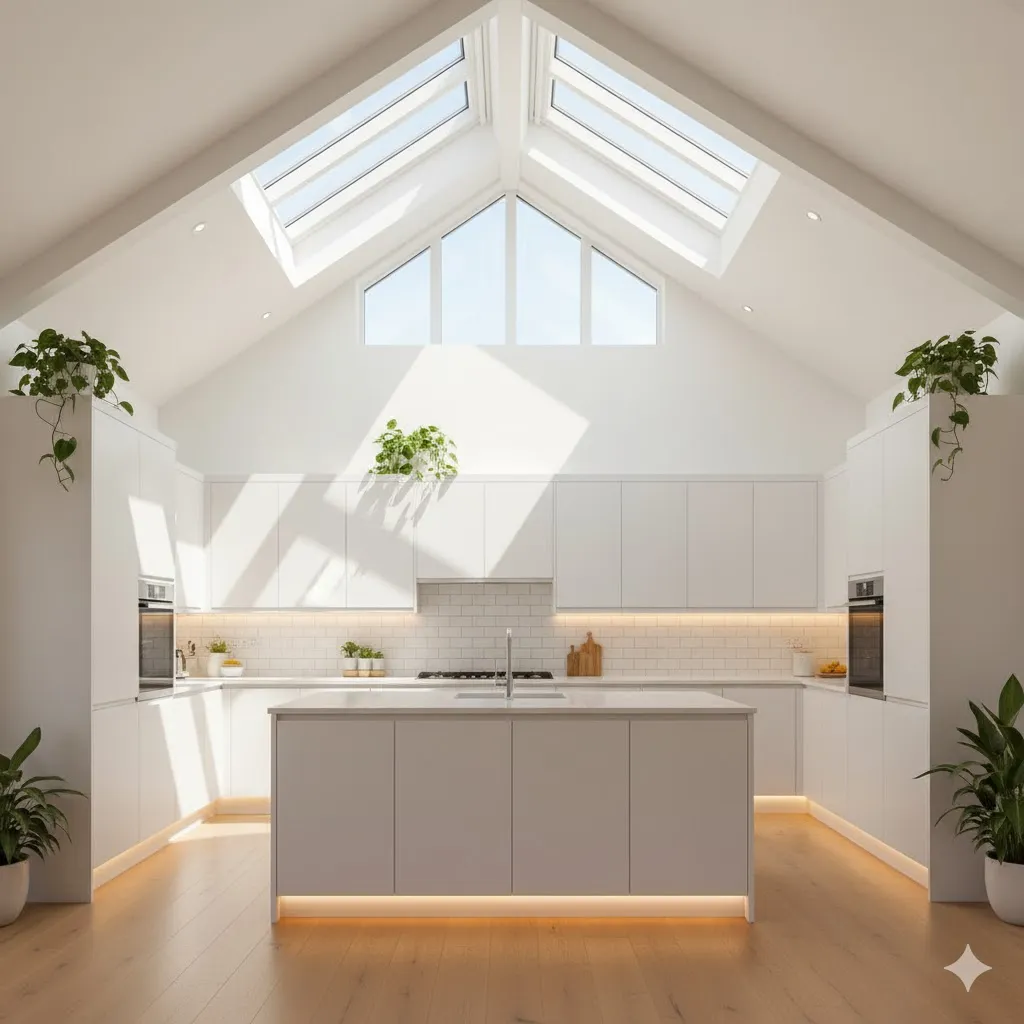
14) Skylights and Solar Tubes (Daylight Boost)
Nothing beats daylight. If your Kitchen Lighting Design is dark by day, consider a skylight or a solar tube. A solar tube channels sunshine through the roof with minimal framing. It brightens the room naturally and cuts daytime energy use. Pair with your electric lights so the room stays balanced from dawn to dusk. Even one well-placed tube can change how the space feels.
15) Mix Metals and Textures for Style
Lighting finishes can make or break the look. Try mixing black with warm brass, or brushed nickel with matte white. Add texture with rattan, ribbed glass, linen shades, Kitchen Lighting Design or hammered metal. Keep a common thread—repeat a finish at least twice so the mix feels intentional. This styling tip makes budget fixtures look custom and adds depth to a simple kitchen.

Common Mistakes to Avoid
It’s easy to buy one pretty light and hope for the best. That’s how you end up with shadows and glare. Avoid placing a single bright fixture in the center and calling it done. Don’t forget under-cabinet light—without it, Kitchen Lighting Design your own body makes shadows on the counter. Keep color temperature consistent so your room doesn’t look patchy. And watch mounting heights: pendants hung too high feel lost; too low and they block views. A few quick checks save you daily frustration.
Glare, Shadows, and “Spotty” Light
Glare happens when you can see the hot bulb or the reflection of it on shiny counters. Choose diffusers, frosted glass, or shaded fixtures to soften the beam. For shadows, Kitchen Lighting Design fill from the front—under-cabinet lights beat ceiling cans at the counter edge. Avoid “spotty” light by overlapping beams slightly. Your eye reads smooth light as calm and high-end.
Ignoring Dimmers and Color Temperature
Dimmers are small heroes. They let one kitchen handle many moments: homework, cooking, parties, Kitchen Lighting Design and quiet nights. Color temperature matters just as much. Choose a consistent range so the space feels unified. If you like warm and cozy, stay 2700K–3000K. If you prefer bright and crisp, try 3500K–4000K. Mixing too widely can make surfaces look off.
Easy Budget Upgrades That Look High-End
You don’t need a full remodel. Swap in high-CRI LED bulbs for better color. Add peel-and-stick under-cabinet strips with a small remote. Replace a tired flush-mount with a slim LED disc. Use corded plug-in sconces to frame a coffee bar. Add toe-kick tape on a motion sensor. If you have glass cabinets, drop in battery puck lights. These small changes create layers, and layers create magic. Your Kitchen Lighting Design will feel brighter, cleaner, and more “designed” in a single afternoon.
Swap Bulbs, Add Strips, Reposition Fixtures
Start with bulbs: match color temperature and upgrade CRI. Next, add under-cabinet strips and dim them to taste. If a pendant looks lost, Kitchen Lighting Design , lower it within the safe range or choose a larger shade. Re-aim track heads to wash walls, not eyes. None of this requires major work, but the payoff is huge. You’ll notice it every time you flip the switch.
Conclusion and Next Steps
A bright, welcoming Kitchen Lighting Design is about layers, balance, and small smart choices. Give the room an even base glow, then add crisp task light where you chop and clean. Finish with soft accents that bring depth and style. Use dimmers and consistent color temperature to keep everything calm and flexible. Whether you swap a few bulbs or plan a full layout, the right lighting turns your kitchen into a place you love—morning to midnight. Start with one zone today, and build from there. Your future self, coffee in hand, will thank you.
FAQs
1) How bright should my kitchen be overall?
Aim for even coverage you can dim. Use recessed or flush-mounts for the base glow, then add task strips for counters. If the room feels too bright or too dim at times, a dimmer solves it fast.
2) What color temperature works best in kitchens?
For cozy, choose 2700K–3000K. For fresh and crisp, go 3500K–4000K. Keep most bulbs the same temperature so your finishes and food look natural.
3) Are pendants or a linear bar better over an island?
Short islands look great with two or three pendants. Long islands often suit a linear bar for cleaner lines. Both should be on dimmers and hung at a comfortable height.
4) Do I really need under-cabinet lights?
Yes. They remove shadows and make prep safer. Even affordable LED strips make a big difference. Mount near the cabinet front edge for best coverage.
5) What if I’m renting and can’t hardwire?
Use plug-in sconces, battery puck lights in cabinets, and peel-and-stick LED strips. Add cord covers and adhesive clips for a tidy look. All upgrades can move with you.